Fire has been the lynchpin in human development for millennia. A source of warmth, comfort, safety, and life. It acts as a focal point for people to gather around to socialise and keeps you cosy on nights out under the stars. There are a couple of different types of outdoor fireplaces: Braziers, a portable metal unit that holds coals or wood. Chimineas, small stove-type units usually made from clay but also metal. Fire Pits, holes or pits that are usually enclosed with stone to contain the fire. Each unit has it's perks and downfalls but to us, the fire pit is the ultimate outdoor fireplace for it's versatility, not only in it's uses but also in the fuel it burns, and the materials it is made from. It is basically the Jack of All Trades of outdoor fireplaces!

What is a fire pit used for?:
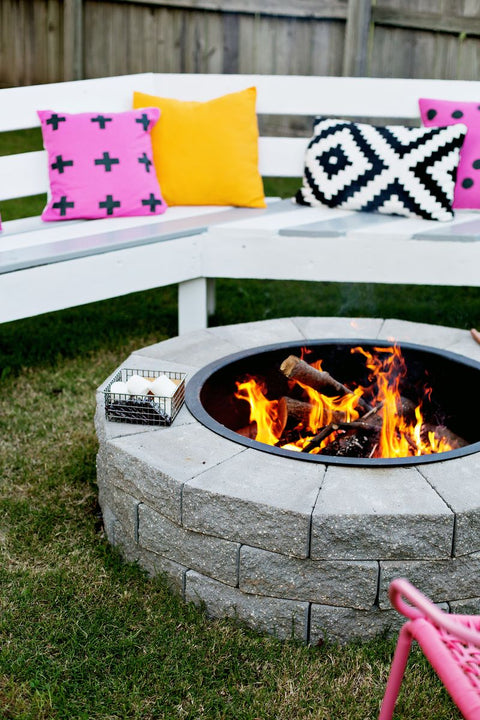
There are many uses for fire pits in the garden; some are practical, some slightly more indulgent! The simple answer is straightforward, it provides a source of heat in your yard meaning you can spend nights outside with friends and family. Giving you the opportunity to turn your garden into another room in your home for relaxing and socialising. Fire pits also provide a natural source of light in your backyard and create the perfect ambience whether it is a small or large space.

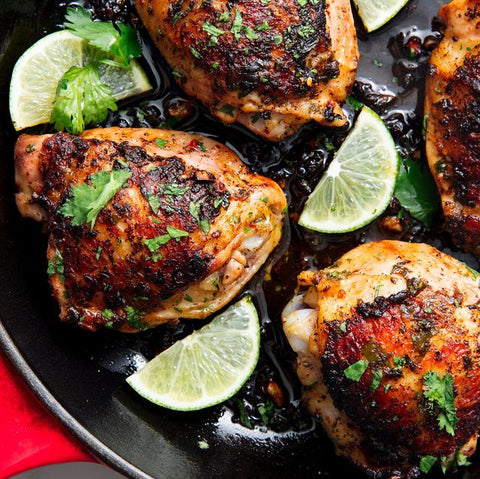
The most practical use for a fire pit, however, is as a cooking implement. Fire pits can easily be altered by including a grate for barbecuing or a skewer for rotisserie cooking. Charcoal or wood will burn equally well in your fire pit meaning you can burn either or both for a variety of flavours in your cooking.
Finally, a well built and finished fire pit can add value to your home if you are looking to sell in the future. A 2017 US survey showed that fire pits are amongst the top 3 most popular back garden additions during renovations and an attractive and well-maintained fire pit will never lose value.
What to burn in a fire pit:
Fire pits, like most versions of fires, come in two varieties; gas and wood burning. Gas fire pits have a lot of advantages: the heat is instant, they can be placed in areas wood-burning alternatives cannot (for example, on decking), and as they are not burning solid fuel they produce less smoke. If you are lucky enough to live in a natural gas area you can tap into the gas lines and have instant access to gas 24/7. Otherwise, gas canisters can be connected to your fire pit to fuel them and make them a portable option.

For wood fire pits basically any type of firewood, logs, or briquettes can be used for heat. If you’re new to the firewood game I suggest having a read through our blog on picking the right type of wood. We suggest using hardwood varieties such as Oak, Ash, or Birch as these are denser and will burn for longer, even in an outdoor setting. Our range of heat logs and briquettes are also excellent options for outdoor fireplaces as they are heavily compacted and dense and will cause minimal sparking and they are all sourced from sustainable forestry or recycled products making them more environmentally sustainable.
We've recently expanded our product range to include two types of solid fuel Fire Pits; the Elegante and the Chiaro.
Both are made from Cor-Ten steel so they are hard wearing and long lasting! Their stylish design makes them the perfect addition to any garden, patio, or decking.
If you are looking to cook on your fire pit there are lots of options available also. A lot of varieties of wood you would use for heat can also be used for cooking, however, we recommend using charcoal (Specifically our Marienburg Organic Charcoal) or a combination of both. Start by lighting your fire with wood as usual and adding your charcoal on top. When the fire starts to die down and the coals begin to glow that is the perfect time to start cooking.
Cooking in a fire pit:
Grilling
So now you know how to get your fire pit ready for cooking let's look at the ways you can cook on it. The obvious option is grilling, if you can cook it on a barbecue you can cook it on a fire pit grill. All you need is a suitable grill rack that fits over your fire pit and you’re ready to grill! A host of foods can be cooked on the barbecue, apart from the standard burgers, hot dogs, steaks etc, we’ve also covered some healthy options in our post on Healthy Barbecuing that is definitely worth a read.

Rotisserie
Another option for cooking food on a fire pit is the rotisserie method. Rotisserie can also be known as spit-roasting, it is when meat is skewered through on a spit (a long, sharp, metal rod) and rotated above an open fire to cook. As it is usually a slower cook, the resulting meat is usually more tender and succulent. Some bought fire pits may have this spit built in but if not you can purchase the accessories separately and use them with any fire pit. The key to cooking with the rotisserie method is being able to manage the heat of your fire, this is usually done by being able to raise or lower the meat over the fire as needed. You want to cook your meat in the hot air over the fire, not directly in the flames themselves which can char and dry out the meat.

Pot cooking
Finally, with the right equipment, you can cook in a pot over a fire pit. Cooking up stews, curries, and any other one-pot dish over your fire pit is just as easy as cooking them on your hob with the added bonus of the antiquity and satisfaction of cooking on an open fire in the great outdoors! All you need to do this is a tripod frame with a cast iron pot like below. The process is straightforward, drop it all in the pot and heat it over the open flames until everything is bubbling away happily then dish it up.

Fire Pit Safety:
Fire pit safety is a very real and very important thing. In the hands of responsible people, while being used for their intended purpose fire pits are perfectly safe. However, as with anything care and caution is worth being aware of so we have a couple of important safety notices to keep you safe:- Keep fire pits away from flammable materials, we recommend at least 10 feet away from plants or other flammable items.
- Whenever your fire pit is in action keep something nearby to extinguish it immediately should any problems arise. A bucket of sand will quell any type of fire and would be our top recommendation. However, if you are using a wood fire pit a bucket of water would suffice. With a gas fire pit, a class C suitable fire extinguisher will safely extinguish the fire.
- Don’t position your fire pit underneath an overhang. This includes trees, canopies, umbrellas, awnings etc. This can lead to a build-up of smoke which is not good for your health or it can be a fire risk.
- For wood burning fire pits do not position them on a wooden decking area, a fire-proof base such as stone or paving slabs will not heat up when the pit is in use and the risks of sparks from a wood-burning fire.
- Don’t leave children unsupervised around an active fire pit and also ensure the whole family understands fire safety and knows what to do in the case of a fire.
Making your own fire pit:
If you (like me) love a project, love getting your hands dirty, and love the satisfaction of making something yourself, then we have a few guides and tips for you to help you reach fire pit perfection. Bear in mind, this is not another how-to, or step by step guide to building a fire-pit. If we haven’t made something ourselves, we won’t give you steps on how to do it for safety reasons. Instead, we’ve curated lots of information and answered some questions you might have on making your own to set you on the right path for success.

Firstly, do your research! Have a really thorough look at the space you have to put your fire pit: is it flat enough, are there any potential dangers with overhanging trees, what size of a pit will fit the space, will you have space to sit around the fire. Then decide what you want your fire pit to look like, also be realistic about what you can do yourself. There are hundreds of thousands of pictures online to take inspiration from, but maybe a multi-level fire pit with built-in paved seating area is a little outside of your capabilities. And that’s ok! Your pit should be reflective of your home and your style.
Gather the supplies you’ll need to get started. This will definitely include a shovel, gravel, fire stones and exterior brick/decorative stone, a spirit level, concrete, and most importantly gloves. Other materials will depend on the style you’re going for, paving slabs for decorating around, flat slabs to give a nice edge on the top etc.
Figuring out how much stone you need to make your fire pit is something we weren’t initially sure of so we found the answers for you.
To calculate out how much stone you’ll need for a circular fire pit I am going to defer directly to Hunker who have answered this question very succinctly:
“Calculate how many stones or blocks you will need by multiplying the diameter of the circle by 3.14 (pi). For example, for a 4-foot diameter circle, multiply 48 inches by 3.14 for a total of 150.72 inches. If you are using bricks that measure 4 by 8 inches, divide 150.72 by 4, for a total of 37.68 or 38 bricks for a single layer of the circle.”
Simple right? If you’re going for a square or rectangle fire pit the idea is similar:
If you are making a 4x4 foot square fire pit you need to work out the edge length. 4 foot = 48inches, multiply this by 4 for the total outer length (192inches). If your bricks are 4 by 8 inches then divide 192 by 4 (48). Meaning you will need approximately 48 bricks for each layer of your fire pit.
Now you know what you want to make and have a plan for how to make it let us leave you with some advice we’ve gathered.
Dig a good foundation for your fire pit
It will give your stone perimeter a good base and prevent settling movement, also it will give a good flat surface for the base of your pit so your fire fule won’t roll around. Also as a safety feature, you should ensure there is no flammable organic material inside the fire pit. Your foundation will take care of this risk.
Use the right adhesives
When it comes to adhesives you can use cement or brick adhesive, or depending on your fire pit style you can use nothing; this is called dry stacking the stone. If you are using standard blocks you can easily dry stack your bricks. Doing this means you can move about the blocks for adjusting airflow or easily replace cracked blocks, or even take it all apart and remake it if you choose to. If however, you are using decorative stone, dry stacking may not be possible as uneven surfaces will need to be secured in place to avoid slippage. If you are using a brick adhesive such as gorilla glue or masonry glue, secure your bricks on the outer edge further away from the direct heat of the fire. This will prevent any potential melting or cracking that may release fumes from the product.
Build the right drainage
Drainage is extremely important for your fire pit, especially if you’re building it in Ireland or other wet climates. For your pit to drain appropriately we recommend digging your foundations a little deeper (1-2 feet) in the centre of your pit. Fill this with gravel and sand so water can flow through it as opposed to collecting in your pit.
There are so many excellent videos to show you the steps for assembly so once you know what you want to make we suggest finding a video that suits your style and with the information you’ve learned above, follow their lead. If you’re looking for a square or rectangular fire pit Wickes have a video so simple to follow you could even get the kids on making it.
For circular pits, I liked this video from Mitre 10 New Zealand which covers a simple circular pit:
Or if you're looking for more detail on the bricklaying aspect for your circular pit this video from YouTuber Rodian Builds is a really good watch.
An important note on the second video however; while I really enjoyed the detail, I’m not sure about using a full concrete base as shown. As concrete isn’t porous any water that gathers in the pit will have nowhere to drain too, instead, it will pool and you have to wait for it to evaporate or remove it manually. I think there should have been a smaller circle inside without a concrete base and filled with sand and gravel for drainage. But with that said, his information on forming your fire pit is excellent. Now that you have the important information for building your pit you will be able to follow online guides with more objectivity and make your fire pit exactly what you want.